

How to install tile over wood subfloor |
Categories
|

Preparation Subfloor has to be checked and damages should be fixed. Plywood as well as joists has to be stable – no loose or rotten wood accepted. Mortar should be applied only on clean surface. Backer boards installation Cement backer boards have to be set on mortar and secure with anticorrosive screws every 6 – 8 inches (15 – 20 cm) and 3/4” – 1” from the edges. Seams in between boards have to be taped using fiberglass mesh joint tape with mortar application. * 1/4" thick cement boards commonly used on a remodeling projects. Thickness of most ceramic, porcelain and stone tile plus 1/4” board, and 2x mortar will match the height of 3/4” thick hardwood flooring. Door jambs including casing have to be trimmed to fit the tile underneath. Laying tile According to preferable design start tile installation. Mortar should be mixed with water and applied on backer boards with 1/4” - 3/8” notched trowel. Always measure the room and make proportionally even pieces of tile from two opposite sides for the best visual appearance. If the room is big enough or complex pattern in the center should be installed start laying tile from the middle to all sides and the next day after mortar will dry finish up installation of perimeter tiles. Depending on a type and dimensions of tile as well as chosen design use appropriate spacers (typically 1/16”, 1/8” or 1/4") in between every tile. 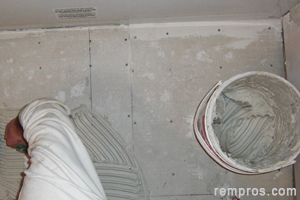
Tile baseboards installation 3” – 4 1/2" high trim tile should be glued to the walls. There is no need in baseboards installation if the whole walls will be tiled. Very often, especially in the rooms other than bathroom wood baseboards might be a good solution. Grouting Depending on a mortar used, waiting time before grout can be applied might vary from couple to 20 – 24 hours. Non-sanded grout should be used for spaces narrower than 1/8” while sanded for wider joints. Grout has to be applied using rubber float and washed out from the surface with wet sponge. Do not try to grout big area at a time if working alone, but apply it on a certain space and wash out all remains from tile surface in 15 – 20 minutes. Sealing the grout Most ceramic tile is glazed with non porous top protective layer and doesn’t require sealing. At the same time, grout has to be sealed to extend its longevity and preserve better visual appearance. Sealer should be applied for any type of stone tile. Tips While shopping for a new ceramic tile always check PEI wearing rating. Low rated tile (group with PEI 1 and PEI 2) might not be installed on the floor due to its low abrasion resistance. Even though it will cost more, it is better to use higher quality mortar (thinset) especially for the areas with high traffic. Toilet and pedestal vanity has to be removed and reinstalled after tiling completed. Ceramic tile can be laid to kitchen cabinets with no reason in their lifting. But tile should be installed under the stove, refrigerator and if height allows under dishwasher. 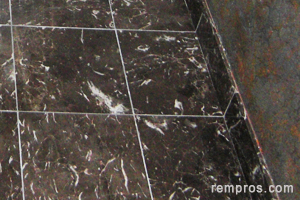
Tools require - Tape measure Materials require - Tile |
|